
Creating an Anaglyph with Gimp
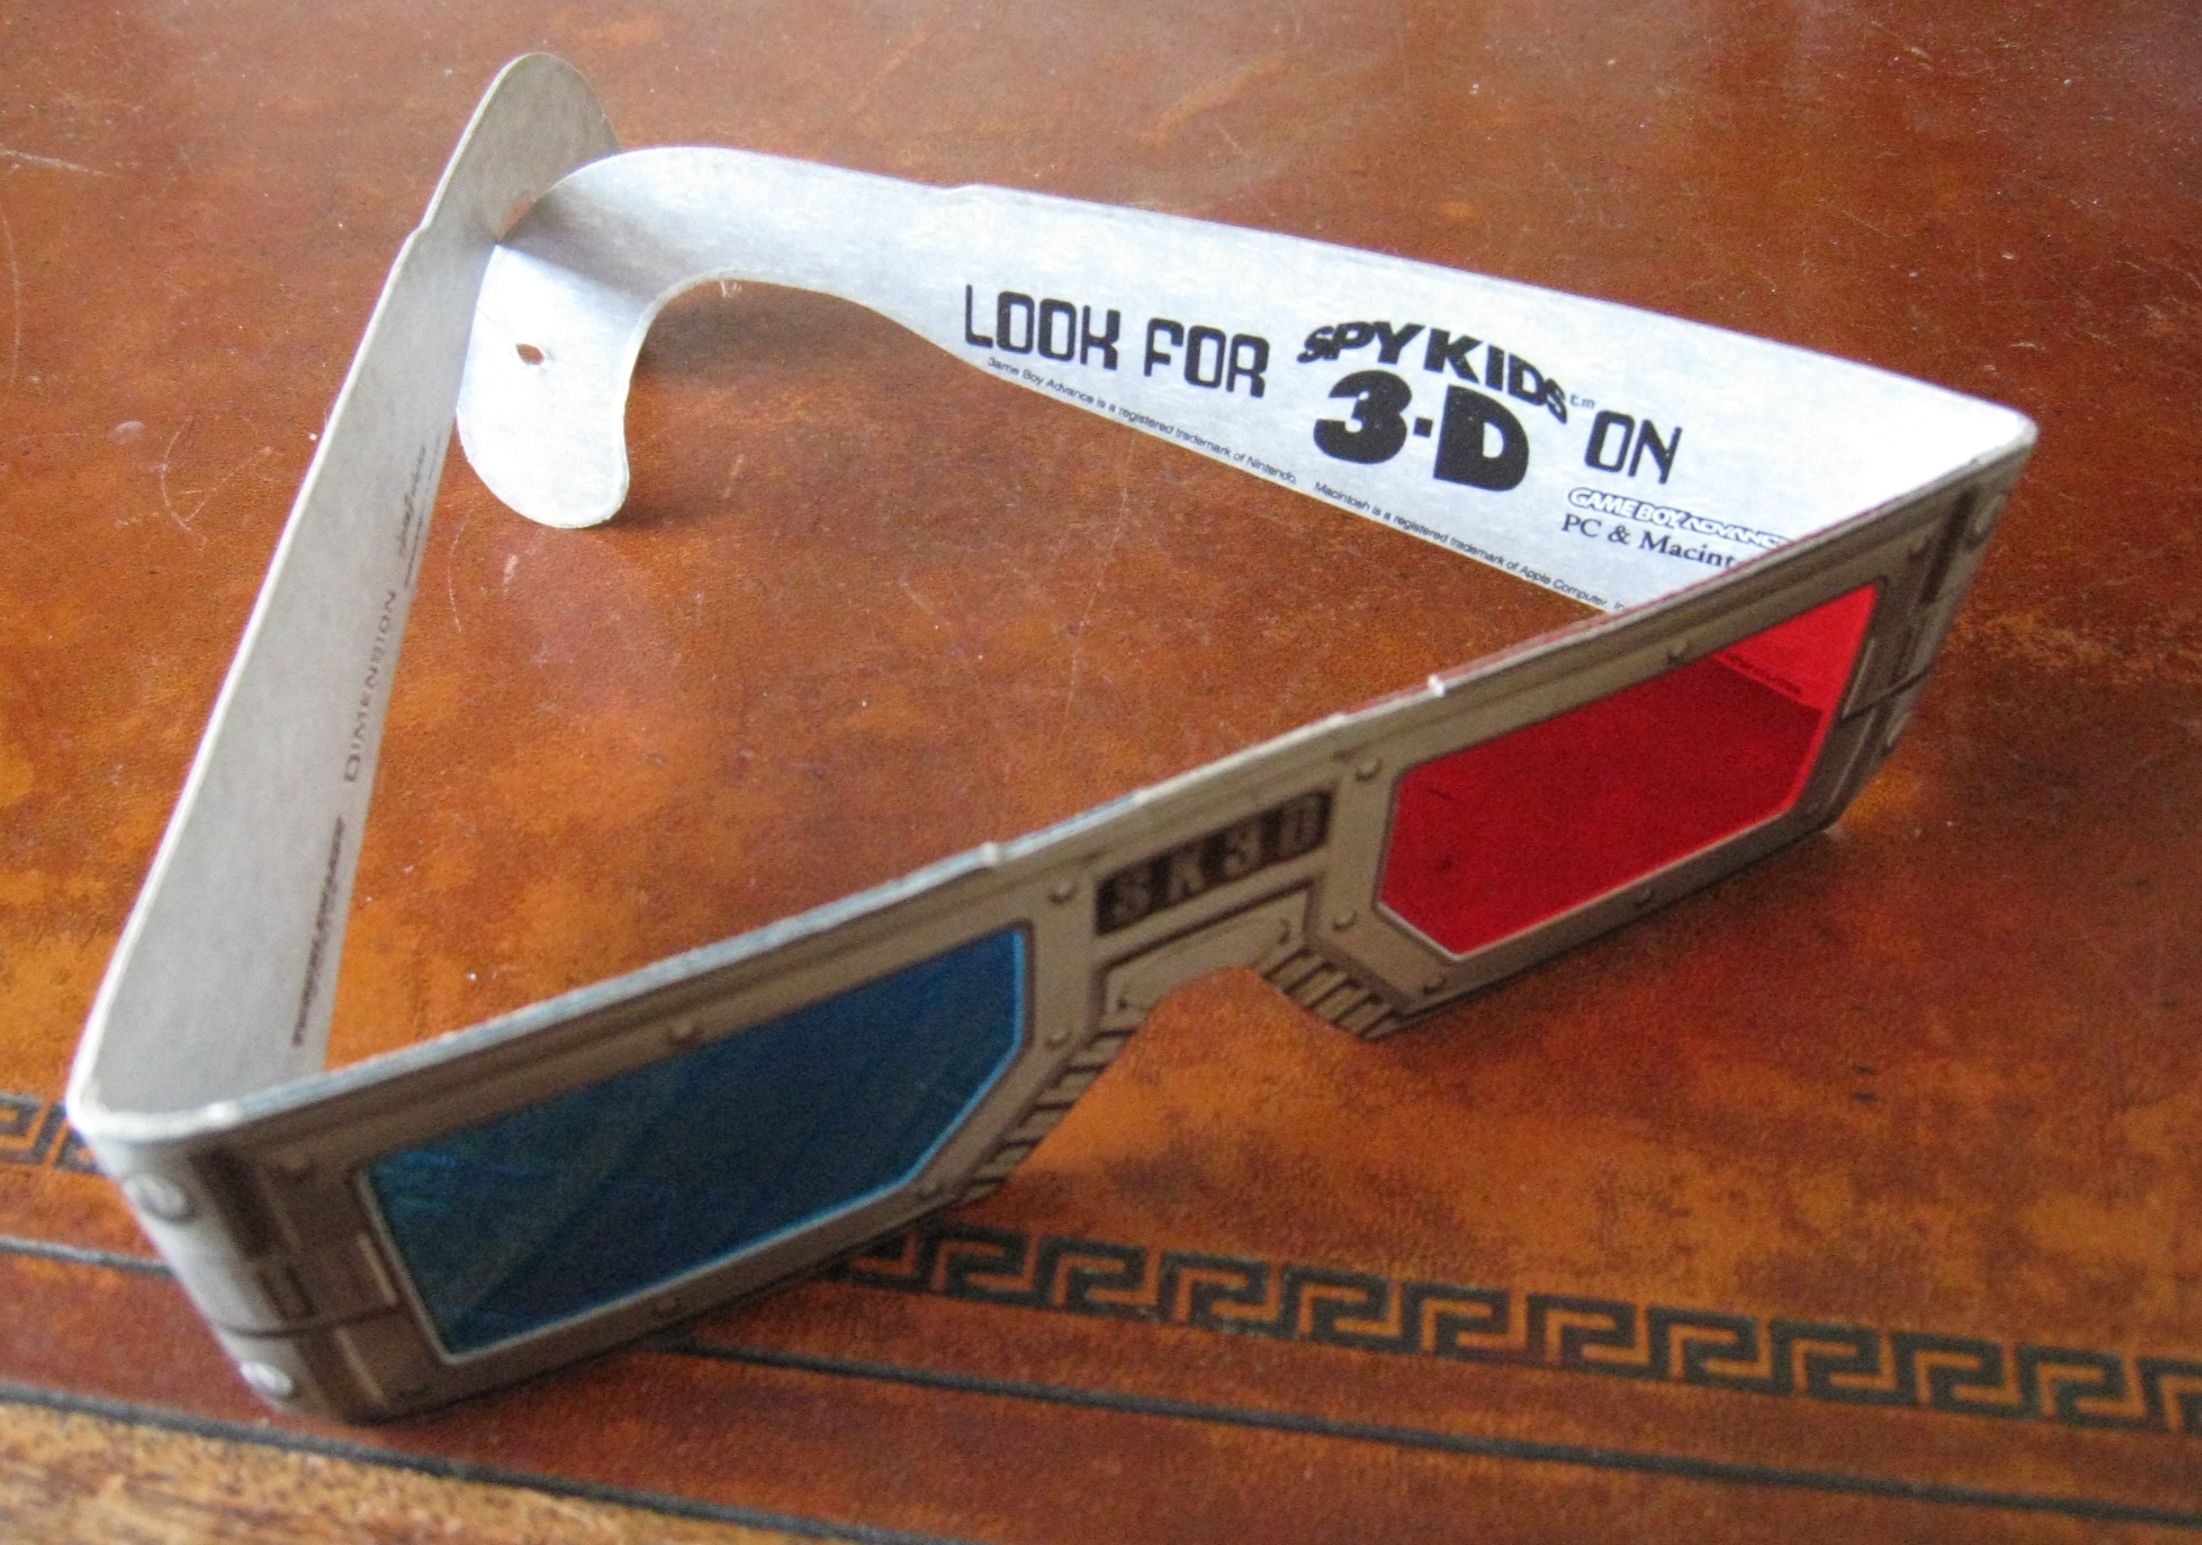 Figure 1. These are the anaglyph 3D glasses I've been using. They're the result of taking the young nieces and nephews out for a movie several years ago. Figure 1. These are the anaglyph 3D glasses I've been using. They're the result of taking the young nieces and nephews out for a movie several years ago.
|
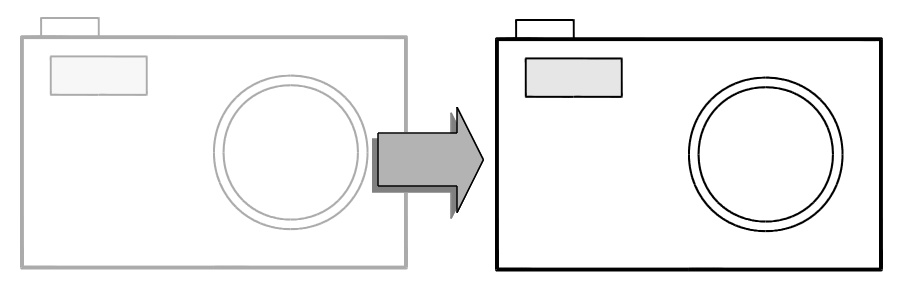 Figure 2. When taking the two images with a single camera, make sure you keep the camera inline between the images. Do not rotate the camera. Figure 2. When taking the two images with a single camera, make sure you keep the camera inline between the images. Do not rotate the camera.
|
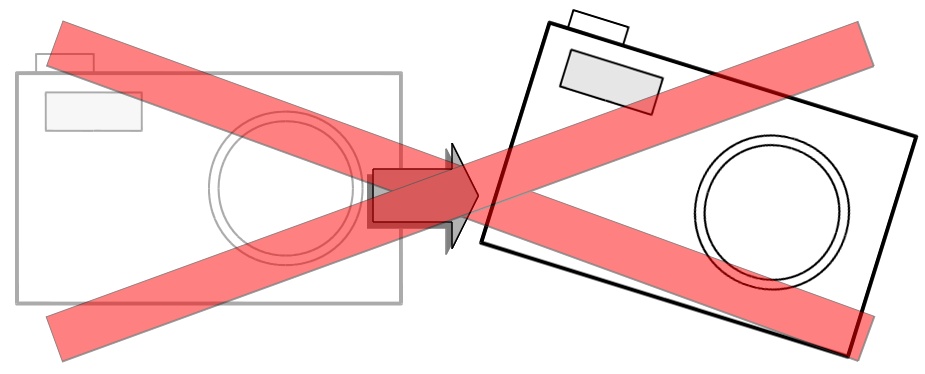 Figure 3. When taking the two images with a single camera, you do not want to rotate the camera between images. Figure 3. When taking the two images with a single camera, you do not want to rotate the camera between images.
|
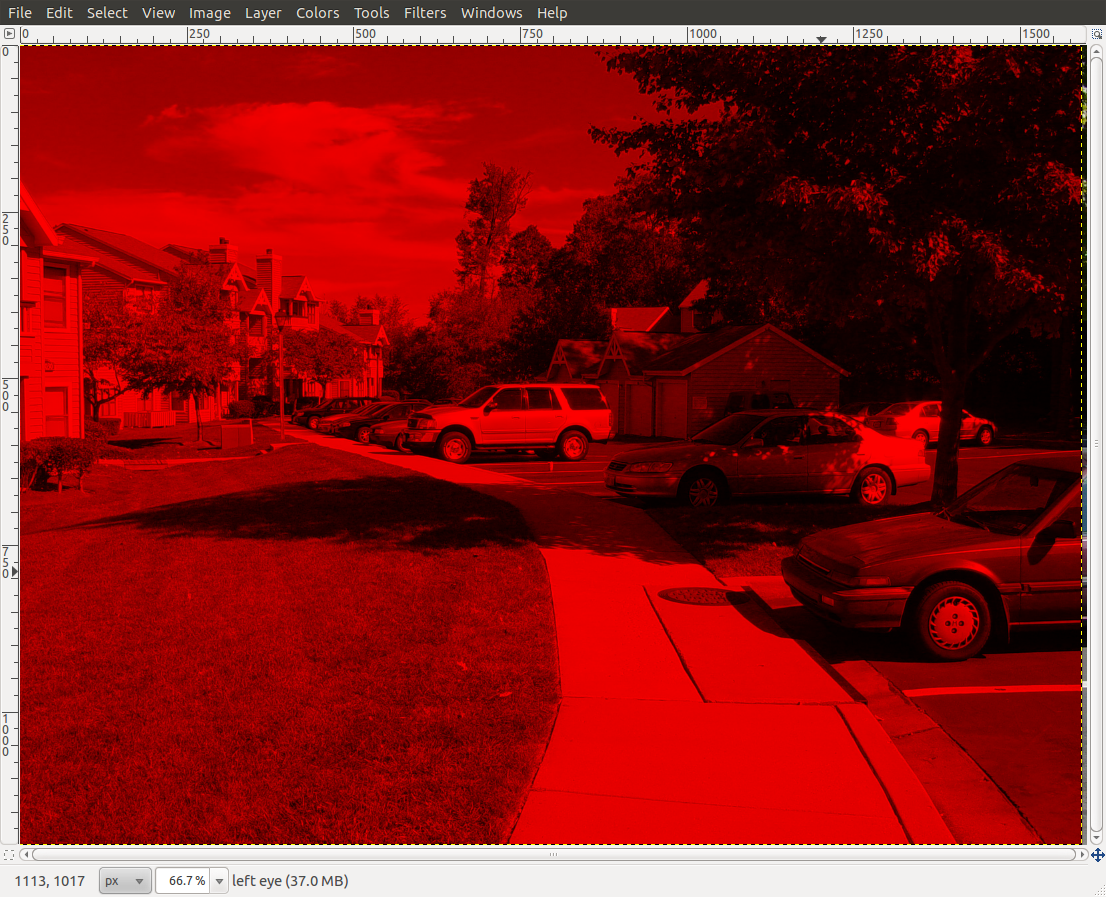
 Figure 4. This is the left eye image. Figure 4. This is the left eye image.
|
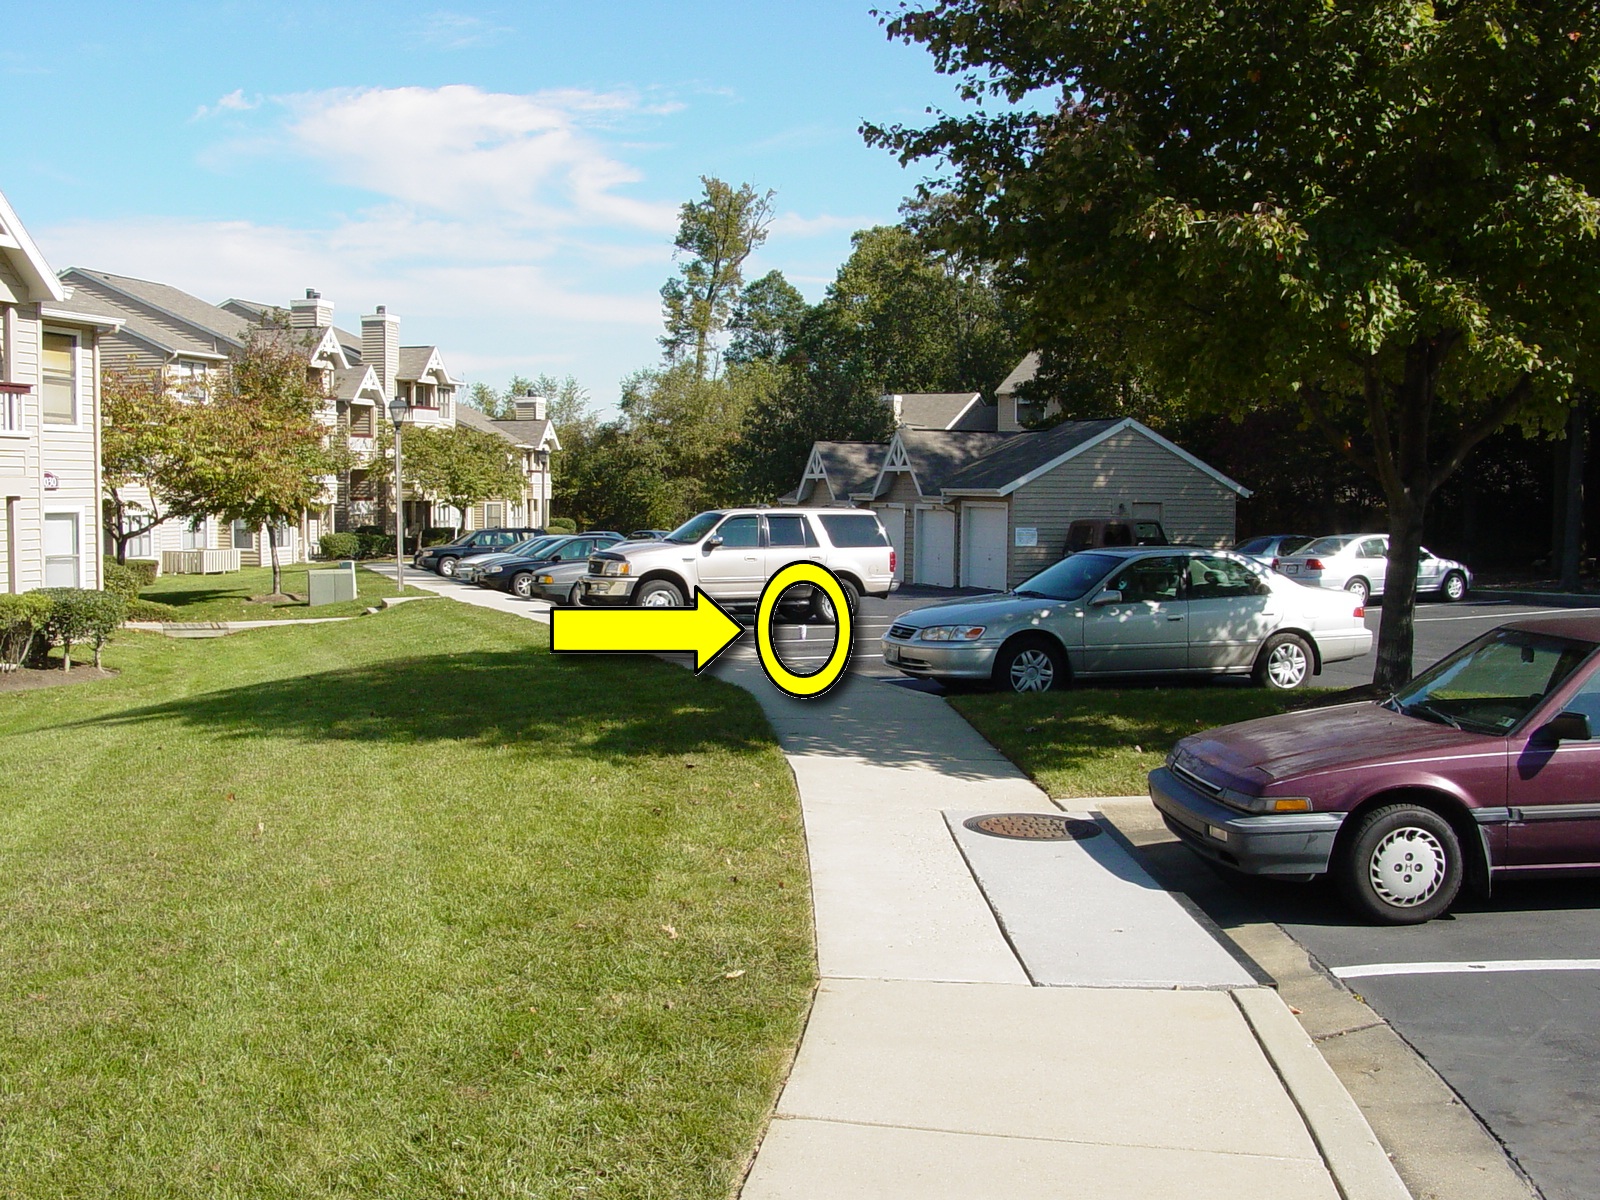
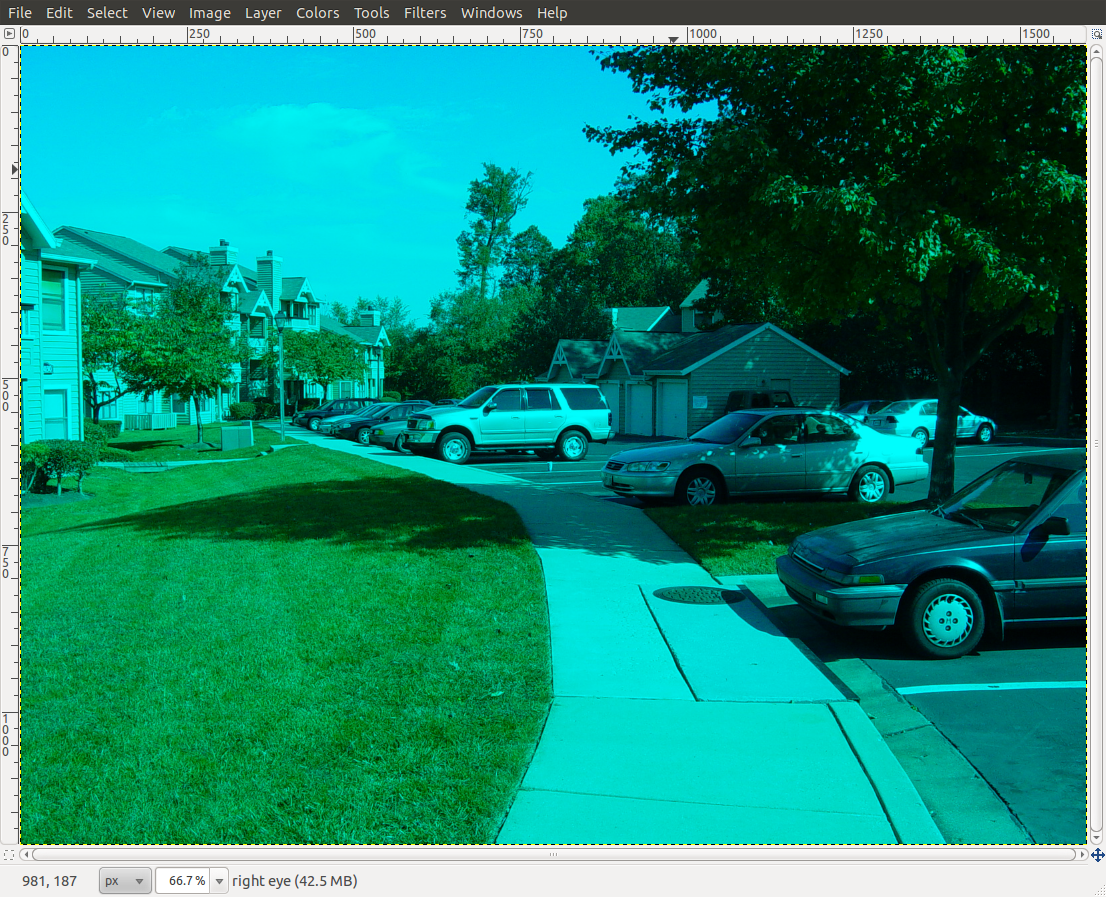
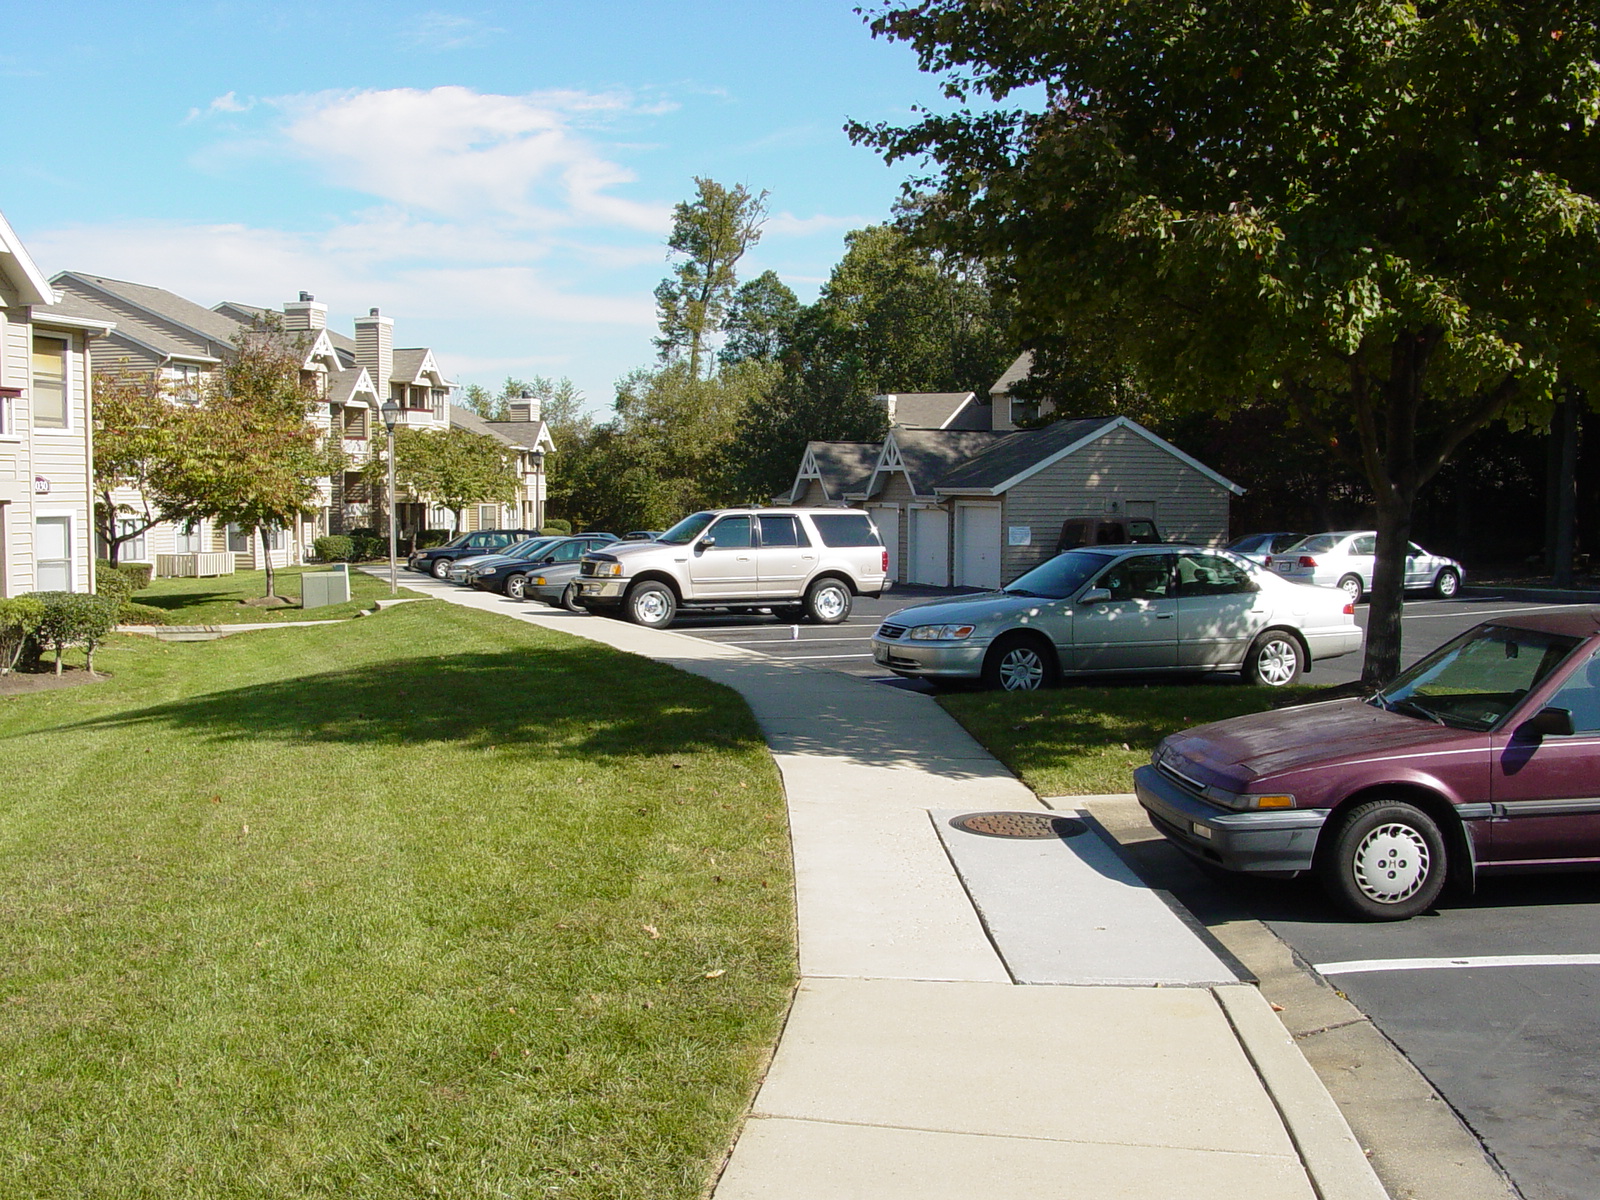 Figure 5. This is the right eye image. Figure 5. This is the right eye image.
|
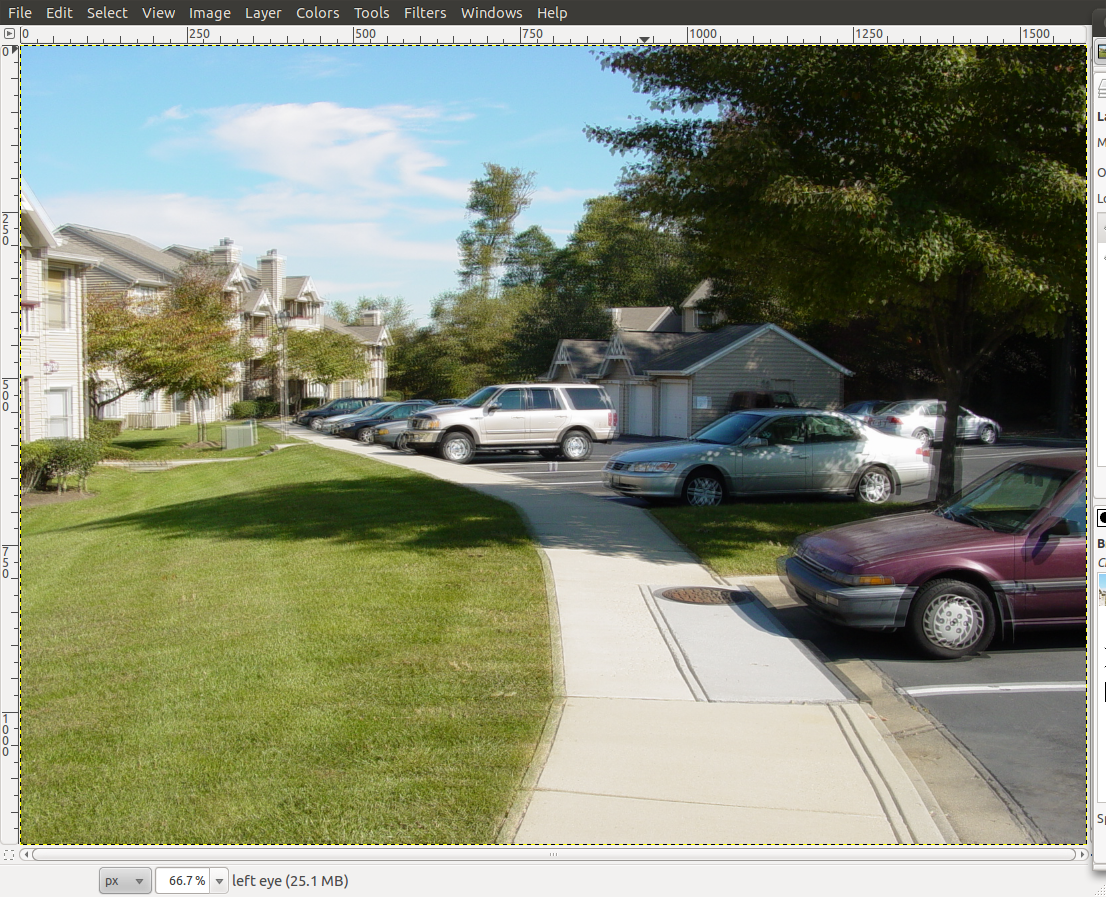
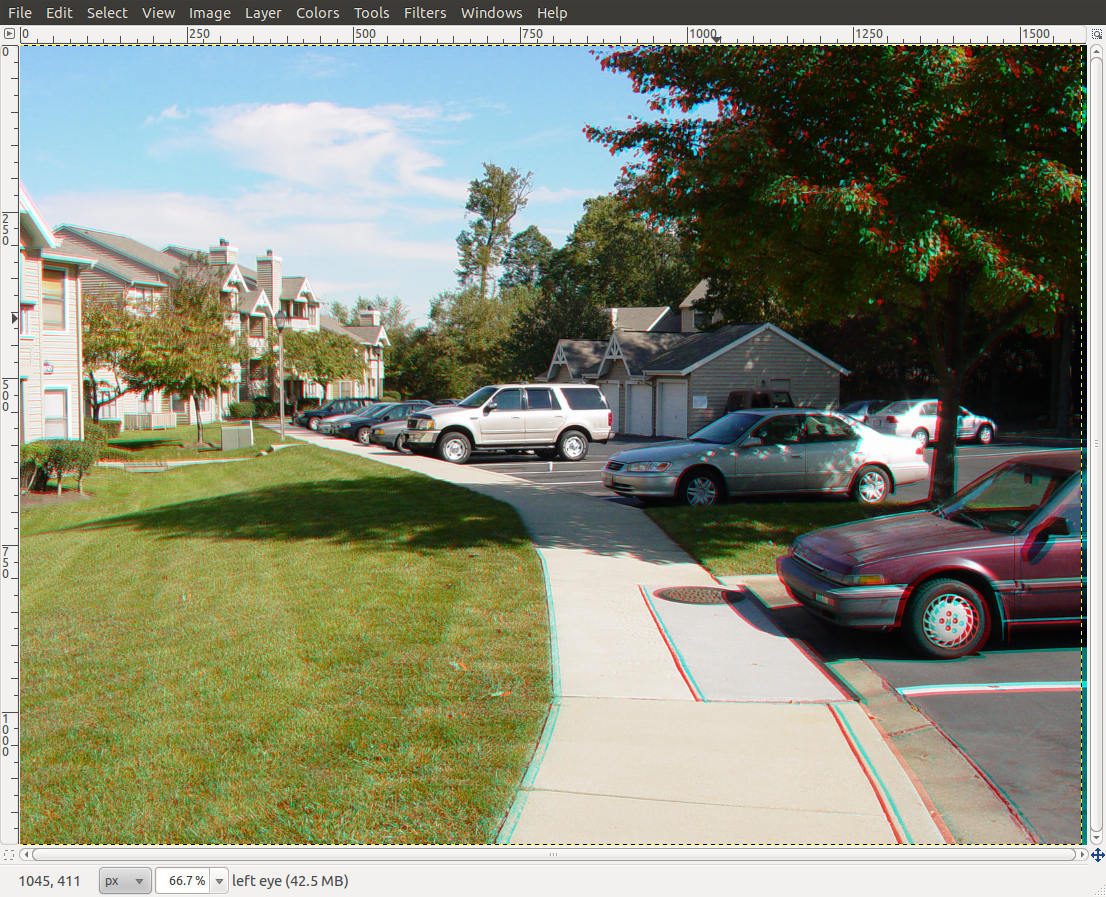 Figure 6. This is the final image, before it has been cropped. Put on your red/blue 3D glasses, click on the picture, and have a look! Figure 6. This is the final image, before it has been cropped. Put on your red/blue 3D glasses, click on the picture, and have a look!
|
This is going to be a tutorial on how to use Gimp (the open source graphics program), along with a couple of pictures you have (or will) taken yourself, to create a three-dimensional image called an anaglyph.
To start, you'll need two pictures, one corresponding to the left eye image and another corresponding to the right. The way I do it is that I take a picture from my right eye (my strong eye), then I move the camera over so that it is in front of my left eye and take another picture. You don't need to move the camera very far; 6 inches will do it. As you may have guessed, this only works on still images. If you want to take stereo images of moving objects, you'll need two cameras working in sync with each other. Still, the cheap way to do it is just do the right - left images (or left - right... your preference) with a single camera. When you take the two images, pick some point in the distance as your focus point. Point the camera at that point for both pictures. The important thing for these types of images is to try to keep the camera as close in line as possible. This means you don't want to rotate the camera between the images. Rotating one image to line it up with the other is possible, but it can be tedious. Even with Gimp.
We'll start with two images, left and right, that I took in a parking lot in front of an apartment building. My focus point was a cup that someone left in the parking lot. Once I had the two pictures loaded onto my computer, I opened both of them into Gimp. Each one started as a separate window. That's how we'll start our tutorial.
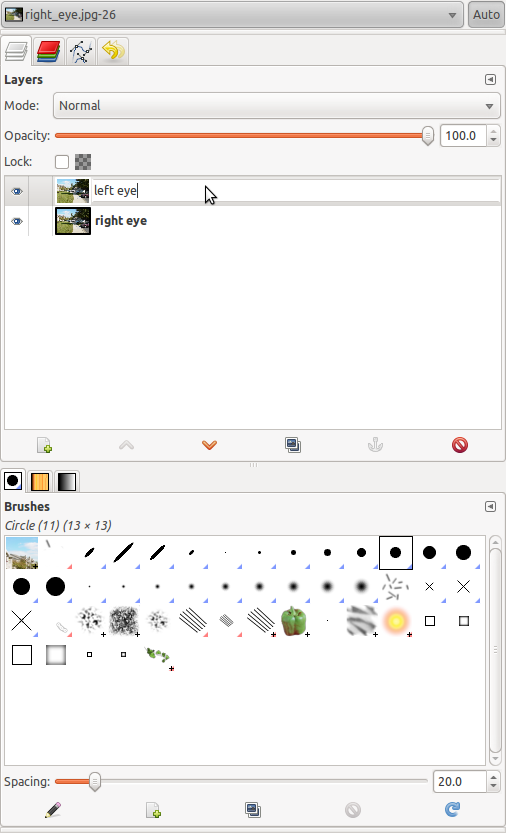
1) Figure out which one of the images you want to use as your primary image. In my case, I chose the right eye image as the primary. Rename the layer from "Background" to "right eye". In the Layers window, double-click on the layer title "Background". Type in "right eye" and press the Enter key. This is only to help you keep things straight.
2) Copy the other eye (in my case, the left eye) onto the primary image as a new layer. Select the image window for the left eye. Click on Edit -> Copy (or just press Ctrl + C). Select the right eye image, then click on Edit -> Paste As -> New Layer. This places the two images one on top of the other.
3) Change the name of the new layer (probably titled "Clipboard") to "left eye". In the Layers window, double-click the new layer title. Type in "left eye" and press the Enter key.
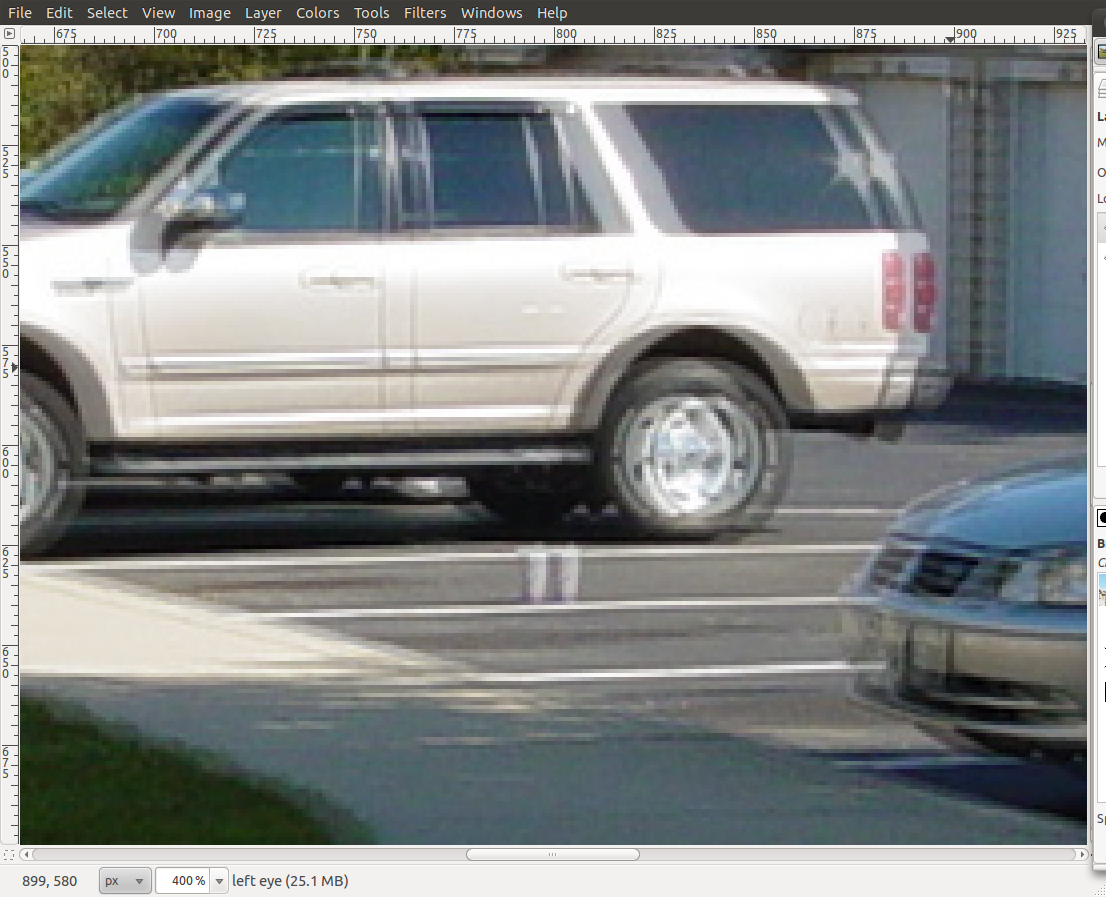
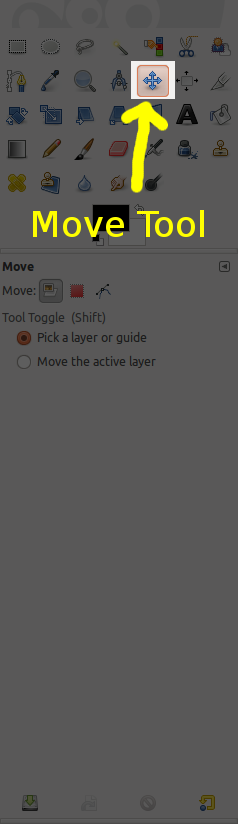
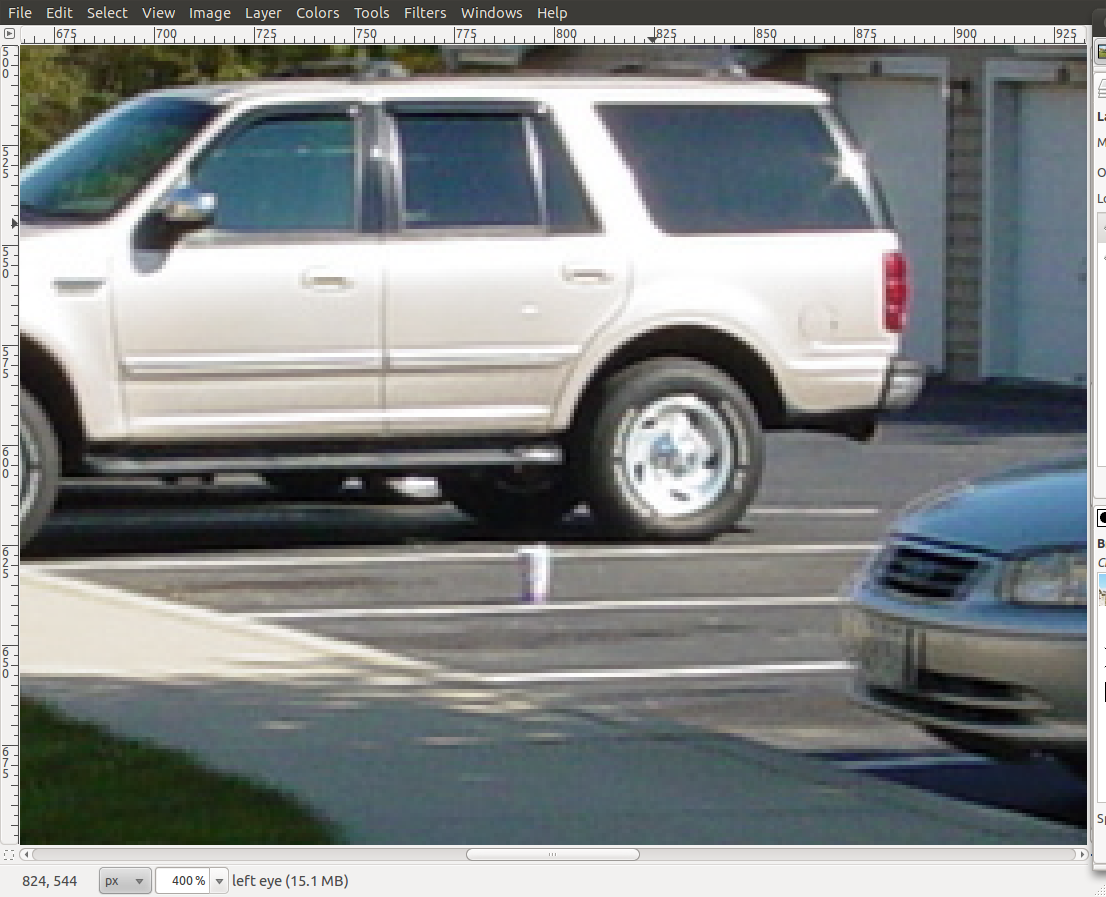
4) Line up the two images. In the Layers window, select the top layer (which if you're following these instructions will be the one corresponding to the left eye). Set the opacity to roughly 50%. You can either use the slider bar or you can type 50 directly into the window next to the slider bar. You should now see an image that appears to be an out-of-focus image. Next, zoom in on the image. You can either do this by clicking on View -> Zoom -> 4:1 (400%). Or you can just repeatedly press the "+" key to zoom in. You'll now see a blown-up version of the out-of-focus image. In the Toolbox window, select the "Move Tool". On the image, click and hold on the image and move it so that you don't see any overlap on your focal point. Unzoom the image back to the window. Either press Ctrl + Shift + E or click on View -> Zoom -> Fit Image to Window. You should now see the whole image. The difference from the original will be that the focal point and the area immediately around it will appear to be in focus. As you move away from the focus, however, the image will appear blurred. Finish this step by changing the opacity of the top layer back to 100%. Click on the top layer (left eye) in the Layers window. Either slide the opacity slider bar in the Layers window all the way to the right or type "100" into the window next to the slider bar.
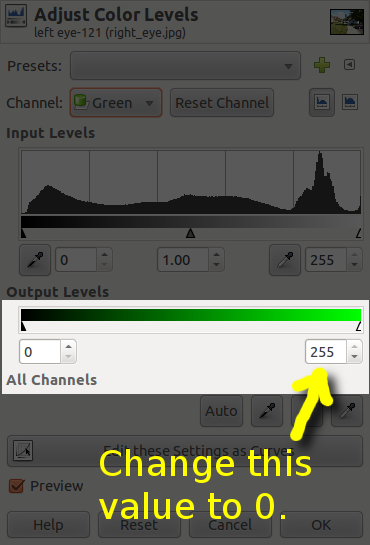
5) Turn the left eye layer red. You're going to do this by removing the green and blue from the layer. In the Layers window, click on the layer marked "left eye". In the main window, click on Colors -> Levels.... In the Levels window that opens up, click on the box marked "Value", then select "Green". In the Levels window, there are two sliders, an upper and a lower. The upper affects the grayscale (brightness and contrast) while the lower affects the saturation of the color. Both sliders start with lower values of 0 and upper values of 255. On the lower slider, type "0" for the upper value. Don't press "OK" yet. Next, click on the "Value" button again (it currently says "Green") and select "Blue". Again, change the right-hand value to "0". Now, press "OK". You should now have a red-colored top layer.
6) Turn the right eye layer blue and green. You're going to do this by removing the red from the right eye layer. In the Layers window, click on the eyeball to the left of the thumbnail for the top layer. This will cause it to disappear. You should now just see the right eye image, which has not been changed in any way yet. Then click on the layer marked "right eye" (the lower layer). In the main window, click on Colors -> Levels.... In the Levels window that opens up, click on the box marked "Value", then select "Red". Change the right-hand value of the lower slider to "0" and press "OK". The image will now have a bluish-green tint to it.
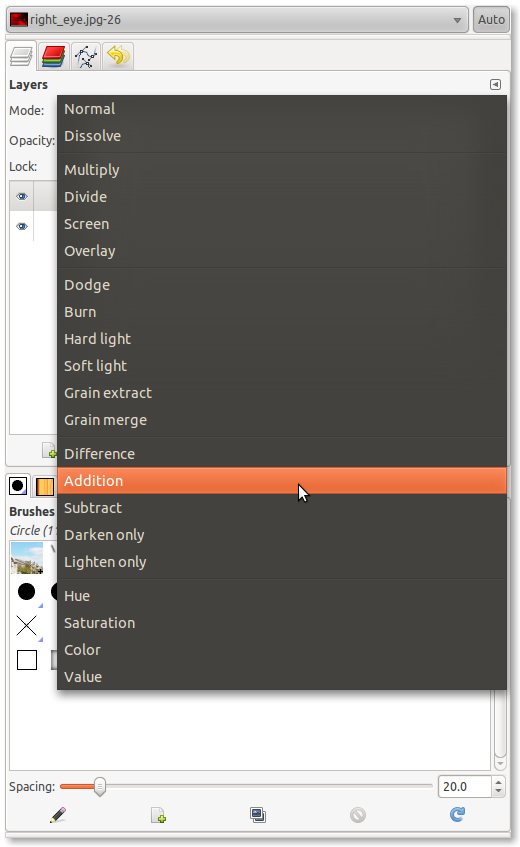
7) Add the two layers together. In the Layers window, click on the eyeball next to the upper layer thumbnail so that the upper layer is visible again. Left-click on the upper layer so that it is selected. Near the top of the Layers window, click on the drop-down menu for "Mode" and select "Addition". You should now have a 3D image. Go ahead and put on your red/blue glasses and look at the image. It should now appear three-dimensional with depth.
The last thing you might want to do is to crop the image so that the small sections on the edges that are either from the red-only or the blue/green-only sections are cut out. Finally, save the image in whatever format you so desire (JPEG, PNG, TIF, whatever).